

Why install a water electrical conductivity sensor?
Installing an electrical conductivity (EC) sensor allows you to monitor the salinity of irrigation water—that is, its ability to conduct electricity based on the concentration of dissolved salts. This reading is a key metric in precision agriculture because:
- Water salinity directly affects nutrient uptake in plant roots.
- EC data allows more precise adjustment of liquid fertilizer doses.
- It supports the selection of crops or varieties better adapted to water quality.
What to consider and what you’ll need
Before installing your EC sensor, consider the following:
- The sensor must always be in contact with water and positioned to avoid air bubbles, which could distort the measurement. In pipelines, this usually requires a T-fitting that holds the sensor slightly below the pipe’s water level.
- Choose an installation site that is:
- Easy to access for maintenance.
- Within strong connectivity range for the connected IoT device Atlas by SPHERAG.
Materials you’ll need for a pipeline installation:
- T-fitting with a female thread.
- Compatible connectors and seals.
- Teflon tape to ensure watertight joints.
- Basic tools (saw or pipe cutter, screwdriver, etc.).
- A shovel or hoe if the pipe is buried.
Tip: If you’re burying the installation, protect the sensor with a utility box for future access and maintenance.
Let’s get to work: installing the ec sensor in 5 easy steps
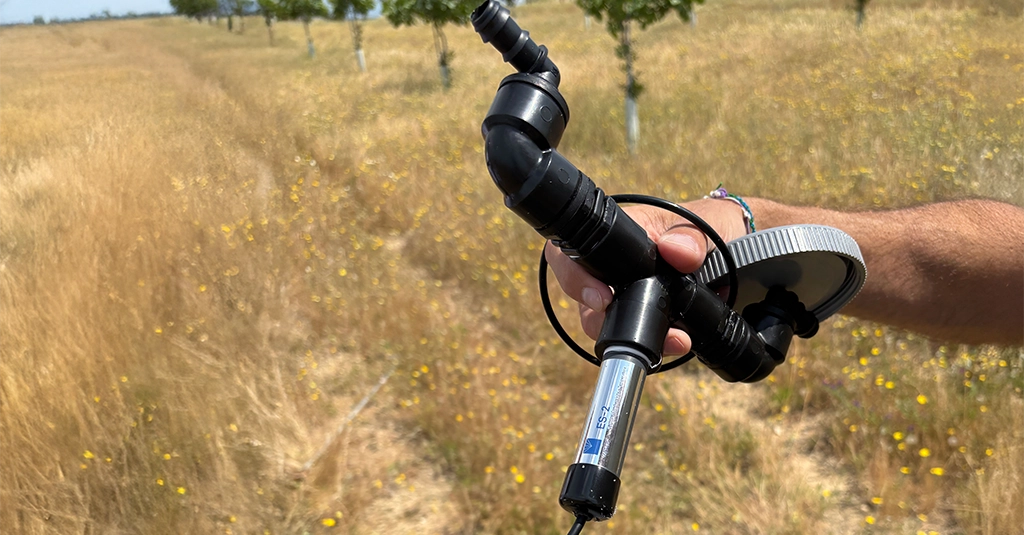
1. Choose the right location
Select a section of pipe that is always full of water, has good network coverage, and can be easily accessed for maintenance.
2. Cut and fit the sensor connection
Use a saw or cutter to open the pipe. Insert a T-fitting with a threaded port. Make sure the sensor will sit slightly lower than the pipe to ensure constant contact with water.
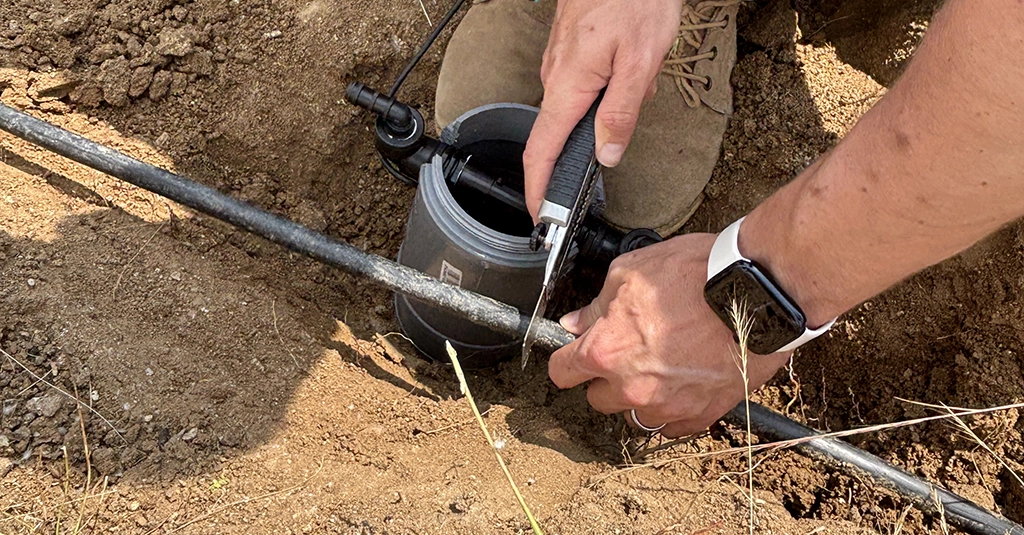
3. Seal the connection
Wrap the threads with Teflon tape to prevent leaks. Screw the sensor in firmly and ensure it’s upright to prevent air pockets.
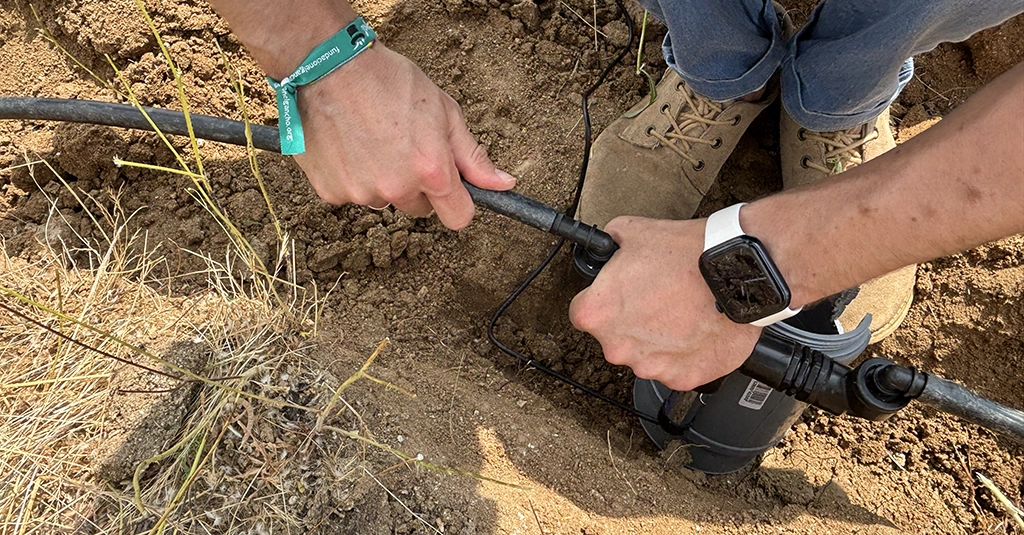
4. Connect to the Atlas IoT device
Plug the sensor cable into the SDI-12 port on your Atlas device using waterproof connectors. Protect the cable routing and ensure there are no sharp bends.
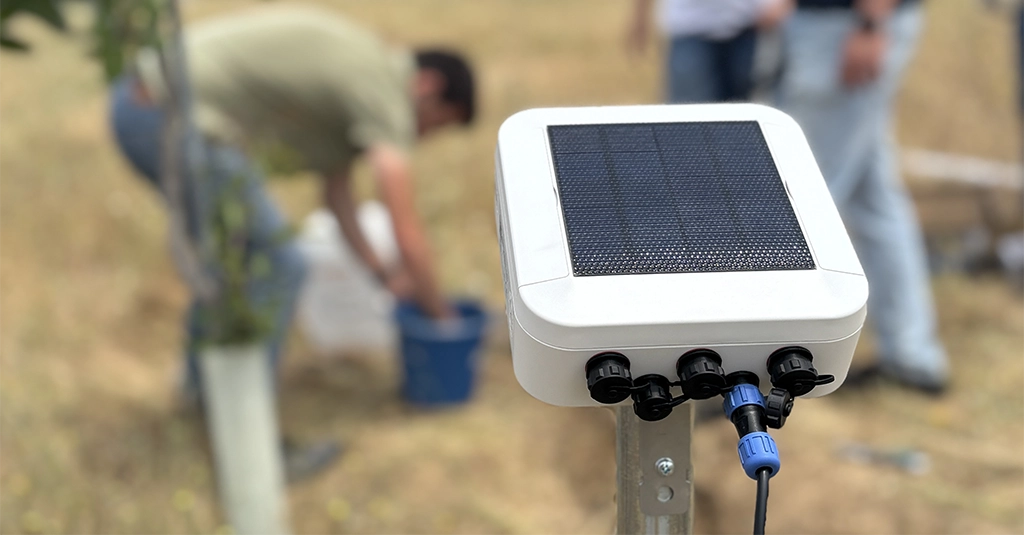
5. Register the sensor on the SPHERAG platform
Log in with your user credentials, click the “+” button, and select “Atlas Stations”, then choose “Electrical Conductivity”. Assign a name, place it on the map, and confirm setup. Done!
If you’re installing the sensor in a water tank or reservoir, simply submerge it into the water using a secure suspension method.
Benefits of using an EC sensor connected to the SPHERAG platform
- Continuous real-time monitoring—no need for manual readings.
- Clear, user-friendly data visualization in charts and graphs.
- Smarter decision-making on fertigation doses, irrigation scheduling, and crop selection.
- Early detection of saline build-up or incorrect fertilizer mixes.
- Cost savings through reduced over-fertilization and prevention of salinity-related crop stress.
Take the next step in smart irrigation
It’s time to move forward with smarter water and nutrient management. Contact the SPHERAG team and learn how integrating an electrical conductivity sensor into your irrigation system can help you save water, optimize fertilizer use, and boost yields—all with real-time data at your fingertips.